Creating content
#How to create an entry
 Creating content with required fields
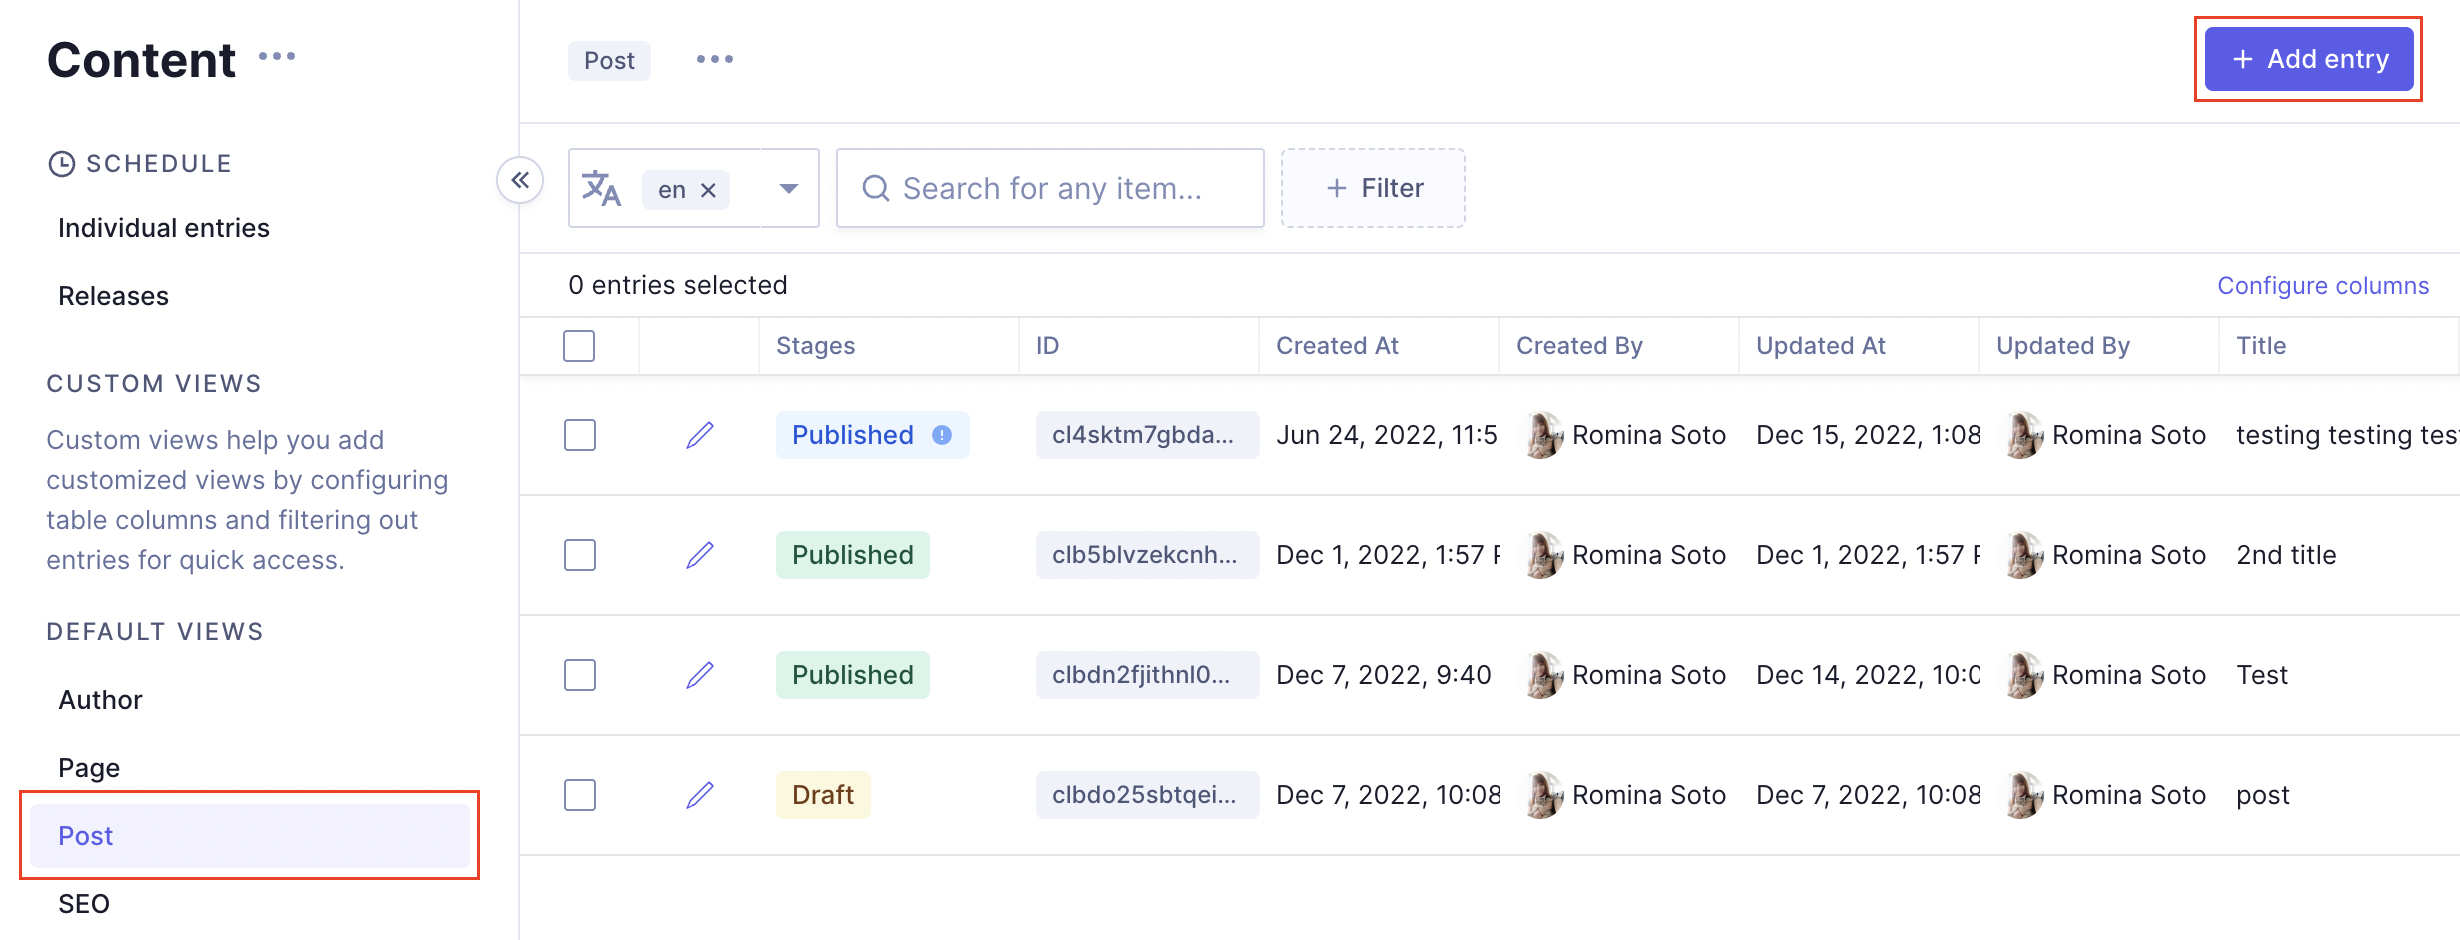
- Navigate to the content tab in the left-hand sidebar.
- Choose a content model from the collapsible sidebar.
- Press "+ Add entry" in the upper-right corner of the page.
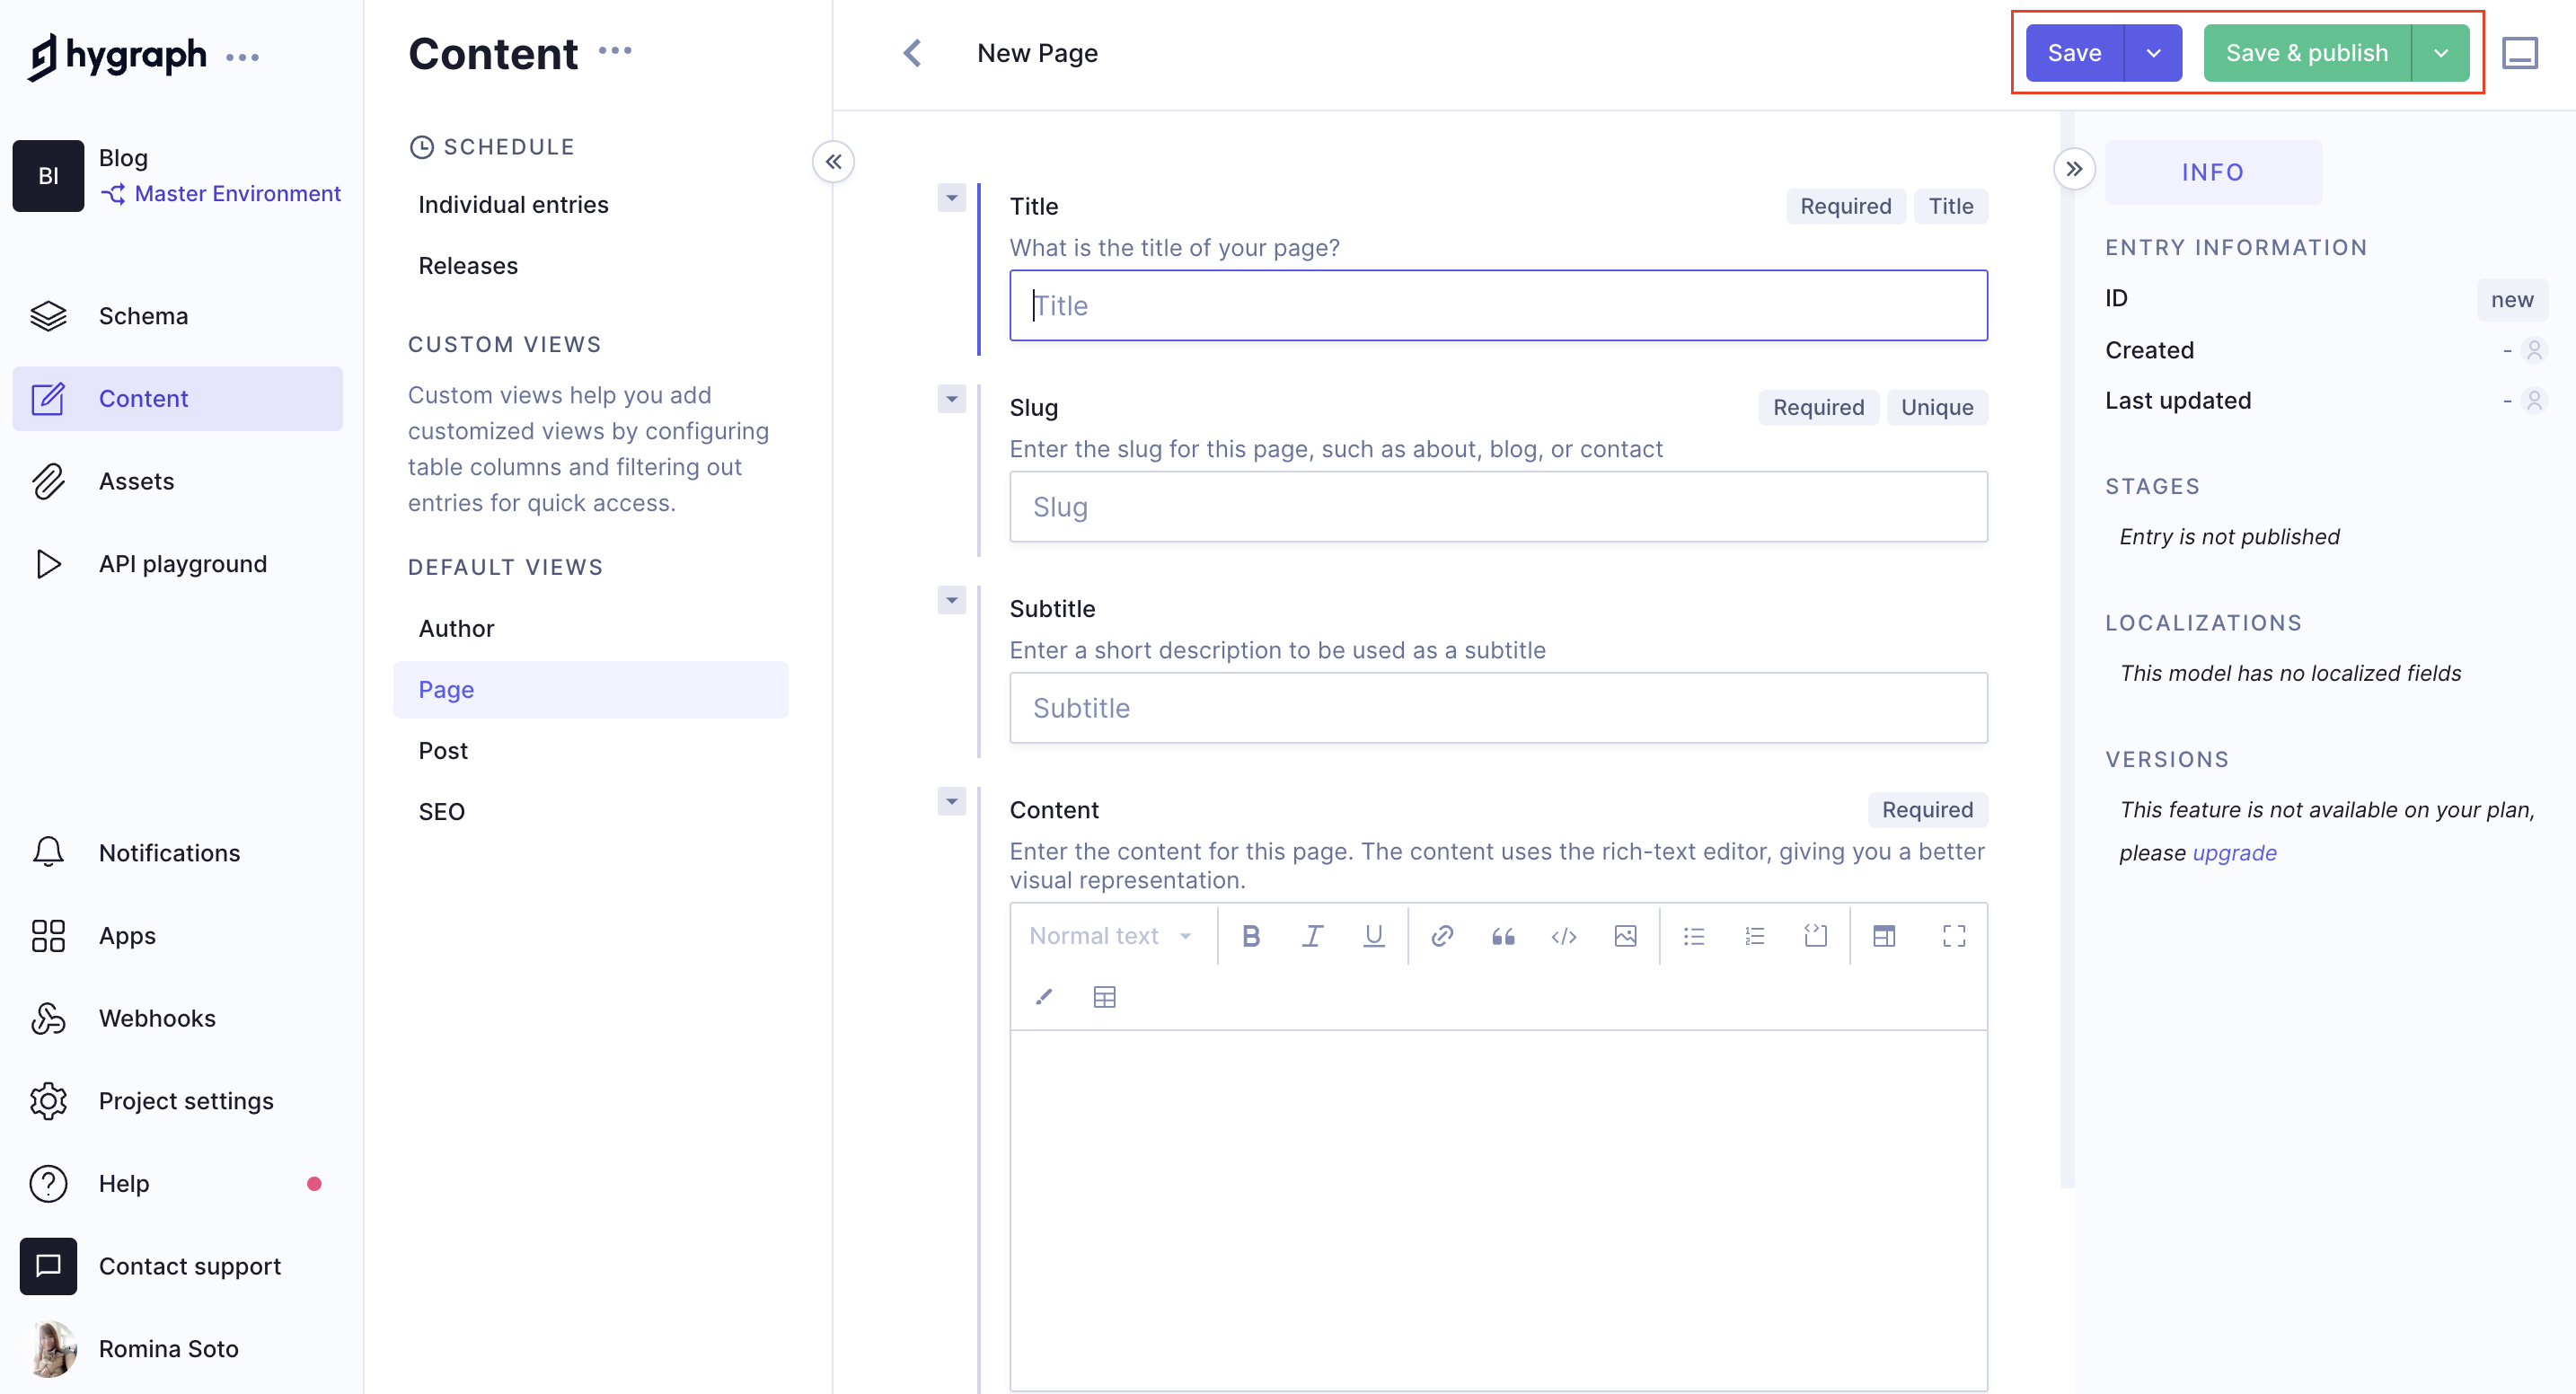
- Fill out the information required by your content model.
- Press "Save" in the sidebar to save your content onto the
DRAFTstage or press Save and Publish to save your content onto both theDRAFTandPUBLISHEDstages, respectively.
 Save and Publish content
The content model defines which fields are required and which fields are not
mandatory.
Hygraph allows the set-up of additional content stages (e.g. a QA and/or ARCHIVED stage) depending on your plan.
The following diagram shows a simplified workflow including 3 content stages - DRAFT, APPROVAL and PUBLISHED - as well as two roles: Editor & Editor Supervisor.
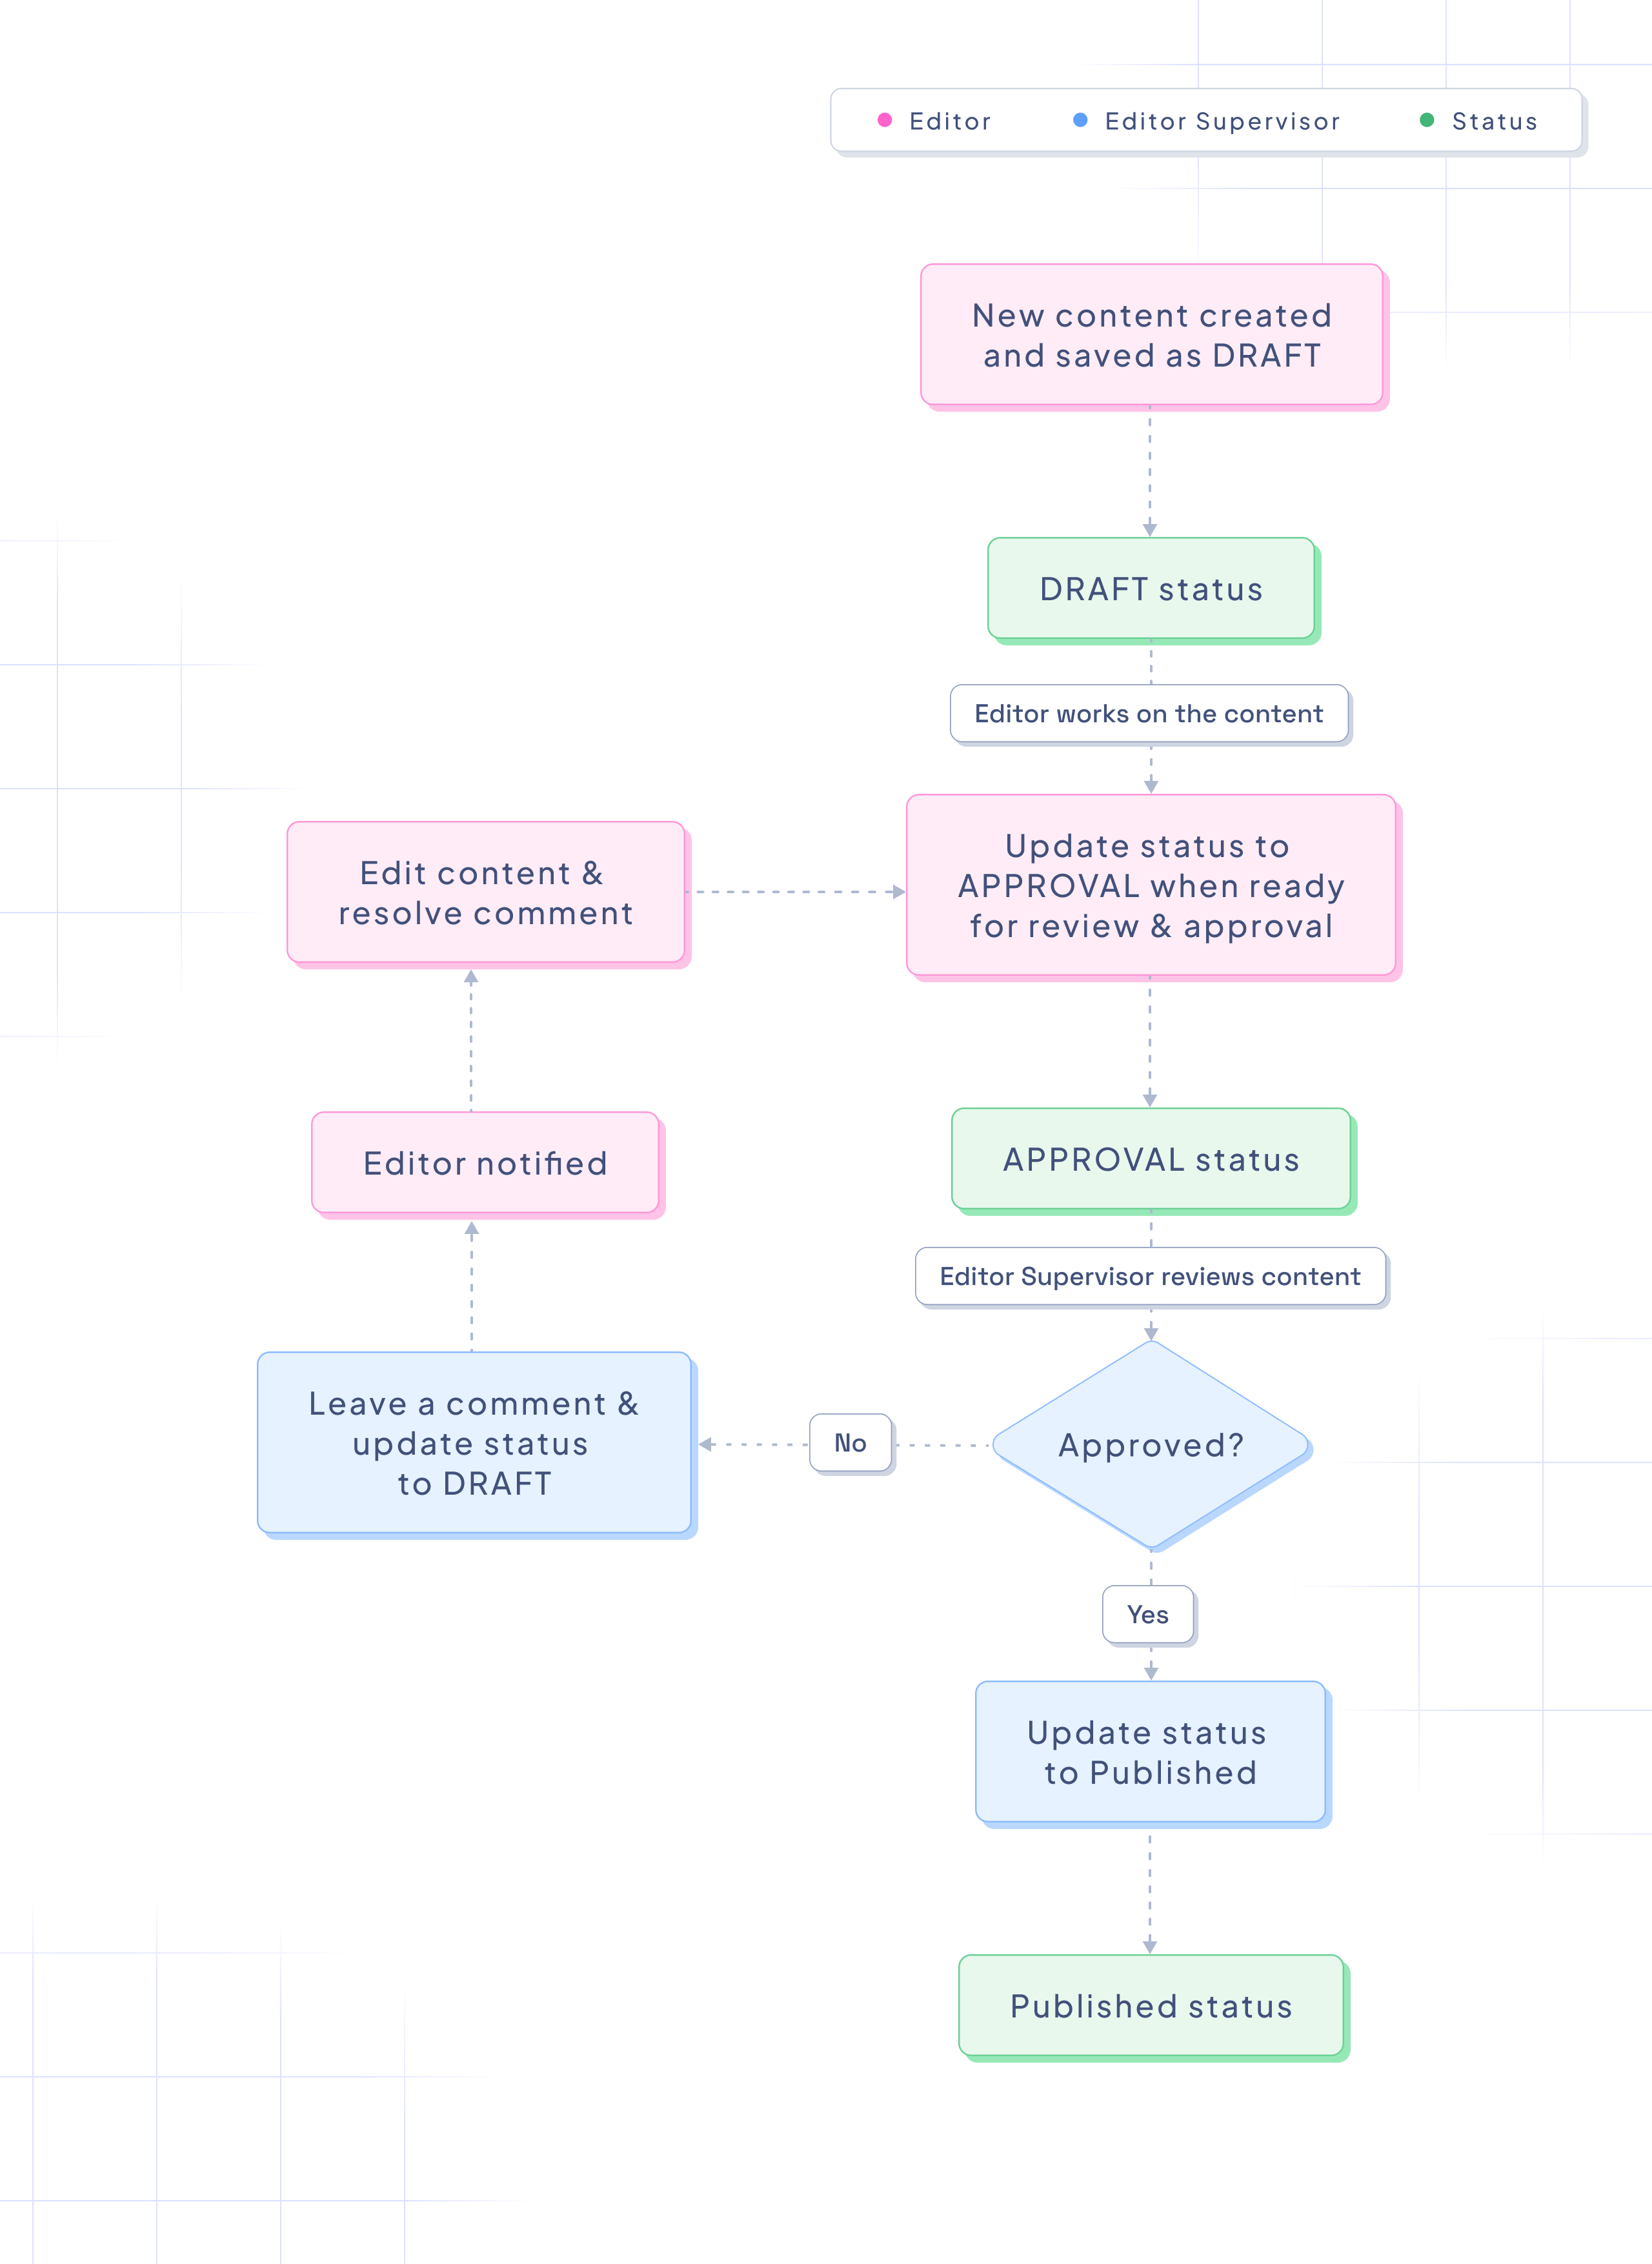 Hygraph workflow with 2 roles
#Connecting related content
For content models that have references, you can either connect an existing entry, or create and connect a new one.
#Relate existing content
- A popup listing all the possible entries of that model will appear.
- Press the link icon at the far left of the content entry.
#Relate new content
- An in-line content editor window for the selected type will appear.
- Fill out for the form's fields.
- Choose to "save" or "save and publish" to create a
DRAFTorDRAFTandPUBLISHEDentry in the related model. Connecting will happen automatically.
#Connecting different types of content
If the relation field you're connecting content to is a union type then you can connect to different content type entries.
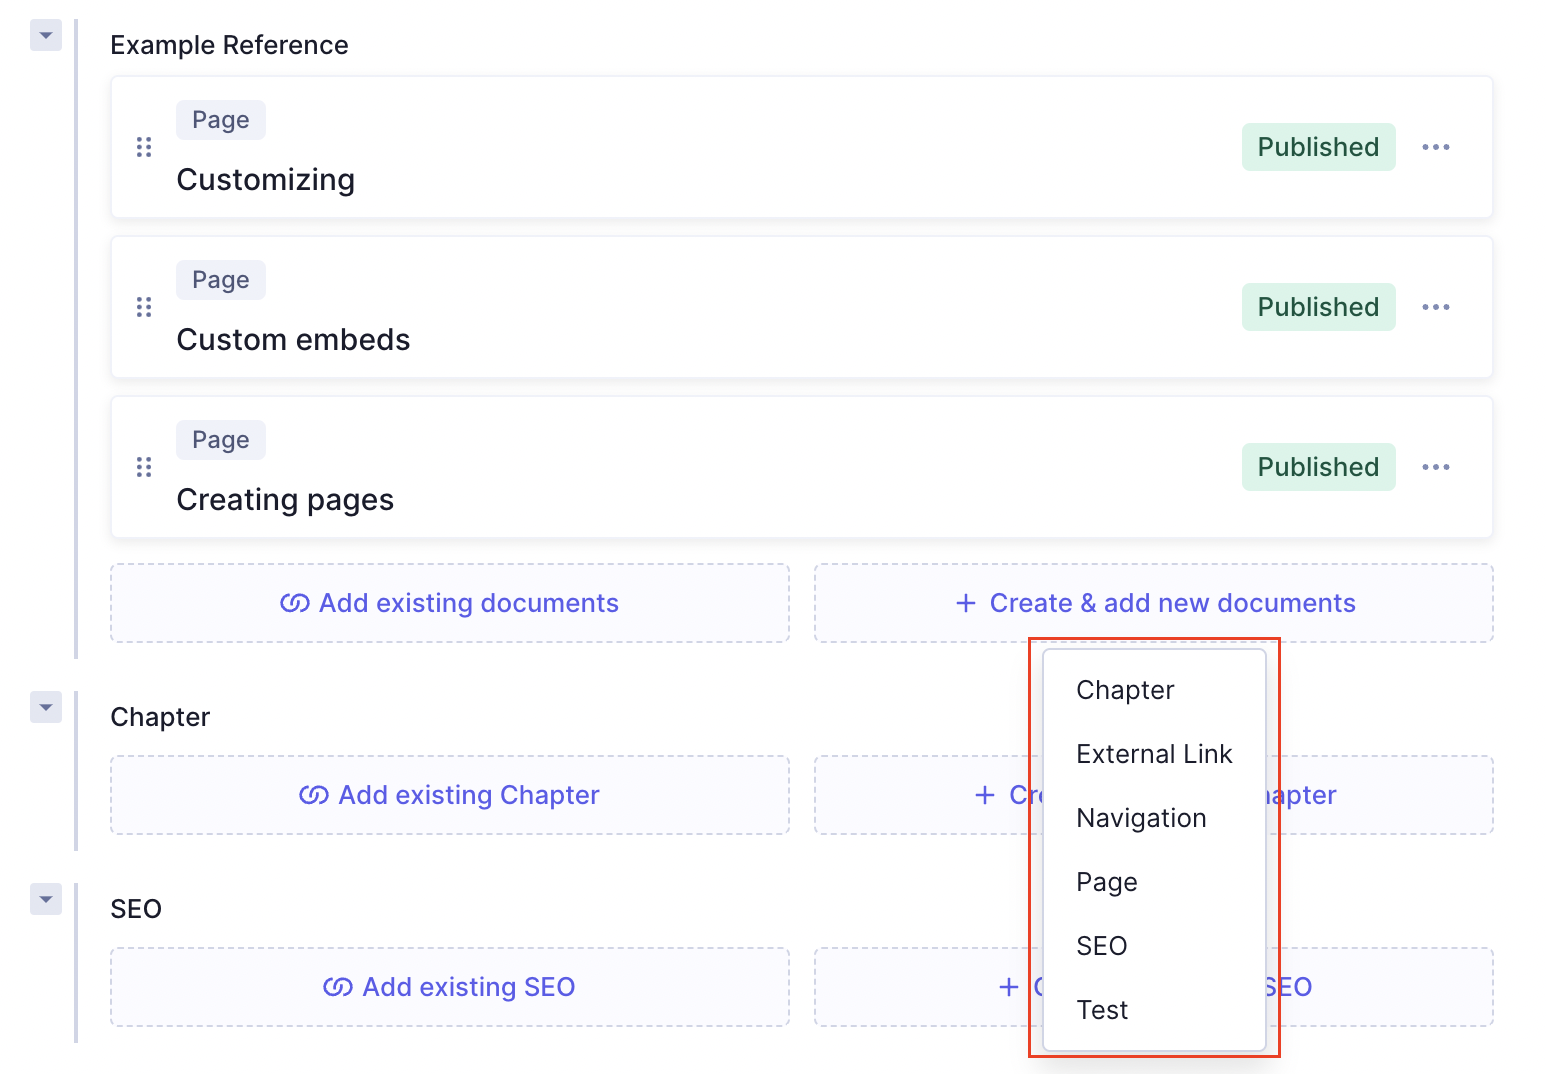 Add a union type content entry relation
Click to add a new or existing entry and select from the list the type of content you want to connect.