Next + Hygraph
#Overview
Next.js is a React framework that you can use to create high-quality web applications powered by React components.
#Creating a new Next app
Start by initializing a new Next.js 14 project. Open up your terminal, navigate to where you want your project, and run the following command:
npx create-next-app my-next-project
The interactive setup will ask you questions to configure your project. Initialize with the following answers:
- Typescript: No
- ESLint: Yes
- Tailwind CSS: Yes
- src/ directory: No
- App Router: Yes
- Import alias: No
After choosing the options, the CLI will install all the necessary pieces to run your Next.js site.
Once the installation completes, open the new Next project in a code editor of your choice.
You need to adjust the default Tailwind styling that Next.js gives us from the installation. To do this, remove the global CSS rules in app/globals.css except the following Tailwind imports:
@tailwind base;@tailwind components;@tailwind utilities;
Change directory to your new Next project run npm install to install dependencies:
cd my-next-project && npm install
Run the command npm run dev to initialize the app. Your site will be available in the browser at http://localhost:3000/.
 Next
Next
#Configure Hygraph assets to work with Next
To work with Next image module, you need to specify Hygraph as an image domain by adding the domain URL in the next.config.js file.
Your config file should contain the following code:
// next.config.js/** @type {import('next').NextConfig} */const nextConfig = {images: {dangerouslyAllowSVG: true,remotePatterns: [{protocol: 'https',hostname: 'media.graphassets.com'},]},}module.exports = nextConfig
#Getting data from Hygraph
Now that you have created your Next project, it's time to add some data from Hygraph. Start by cloning our demo Hygraph project:
Click here to clone the demo projectAfter cloning, you will have a simple project that contains one content model called Page that contains fields for Title, Slug, and Body; and one content entry.
If you navigate to the Schema builder and click on the Page model, you will see this:
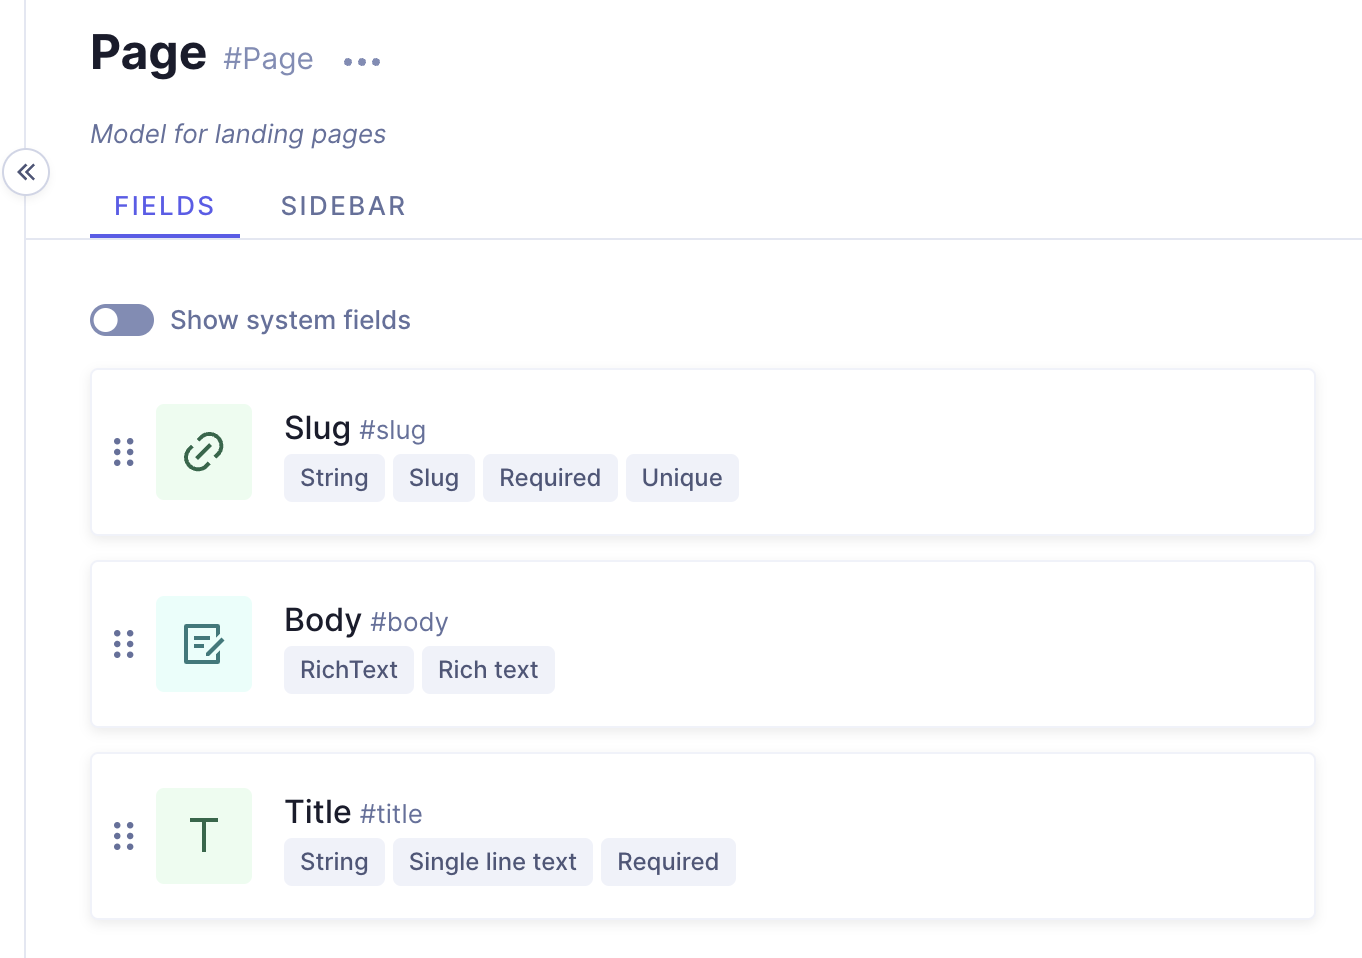 Demo project - Page model
And if you navigate to the Content editor and view the sample entry details, you'll see this:
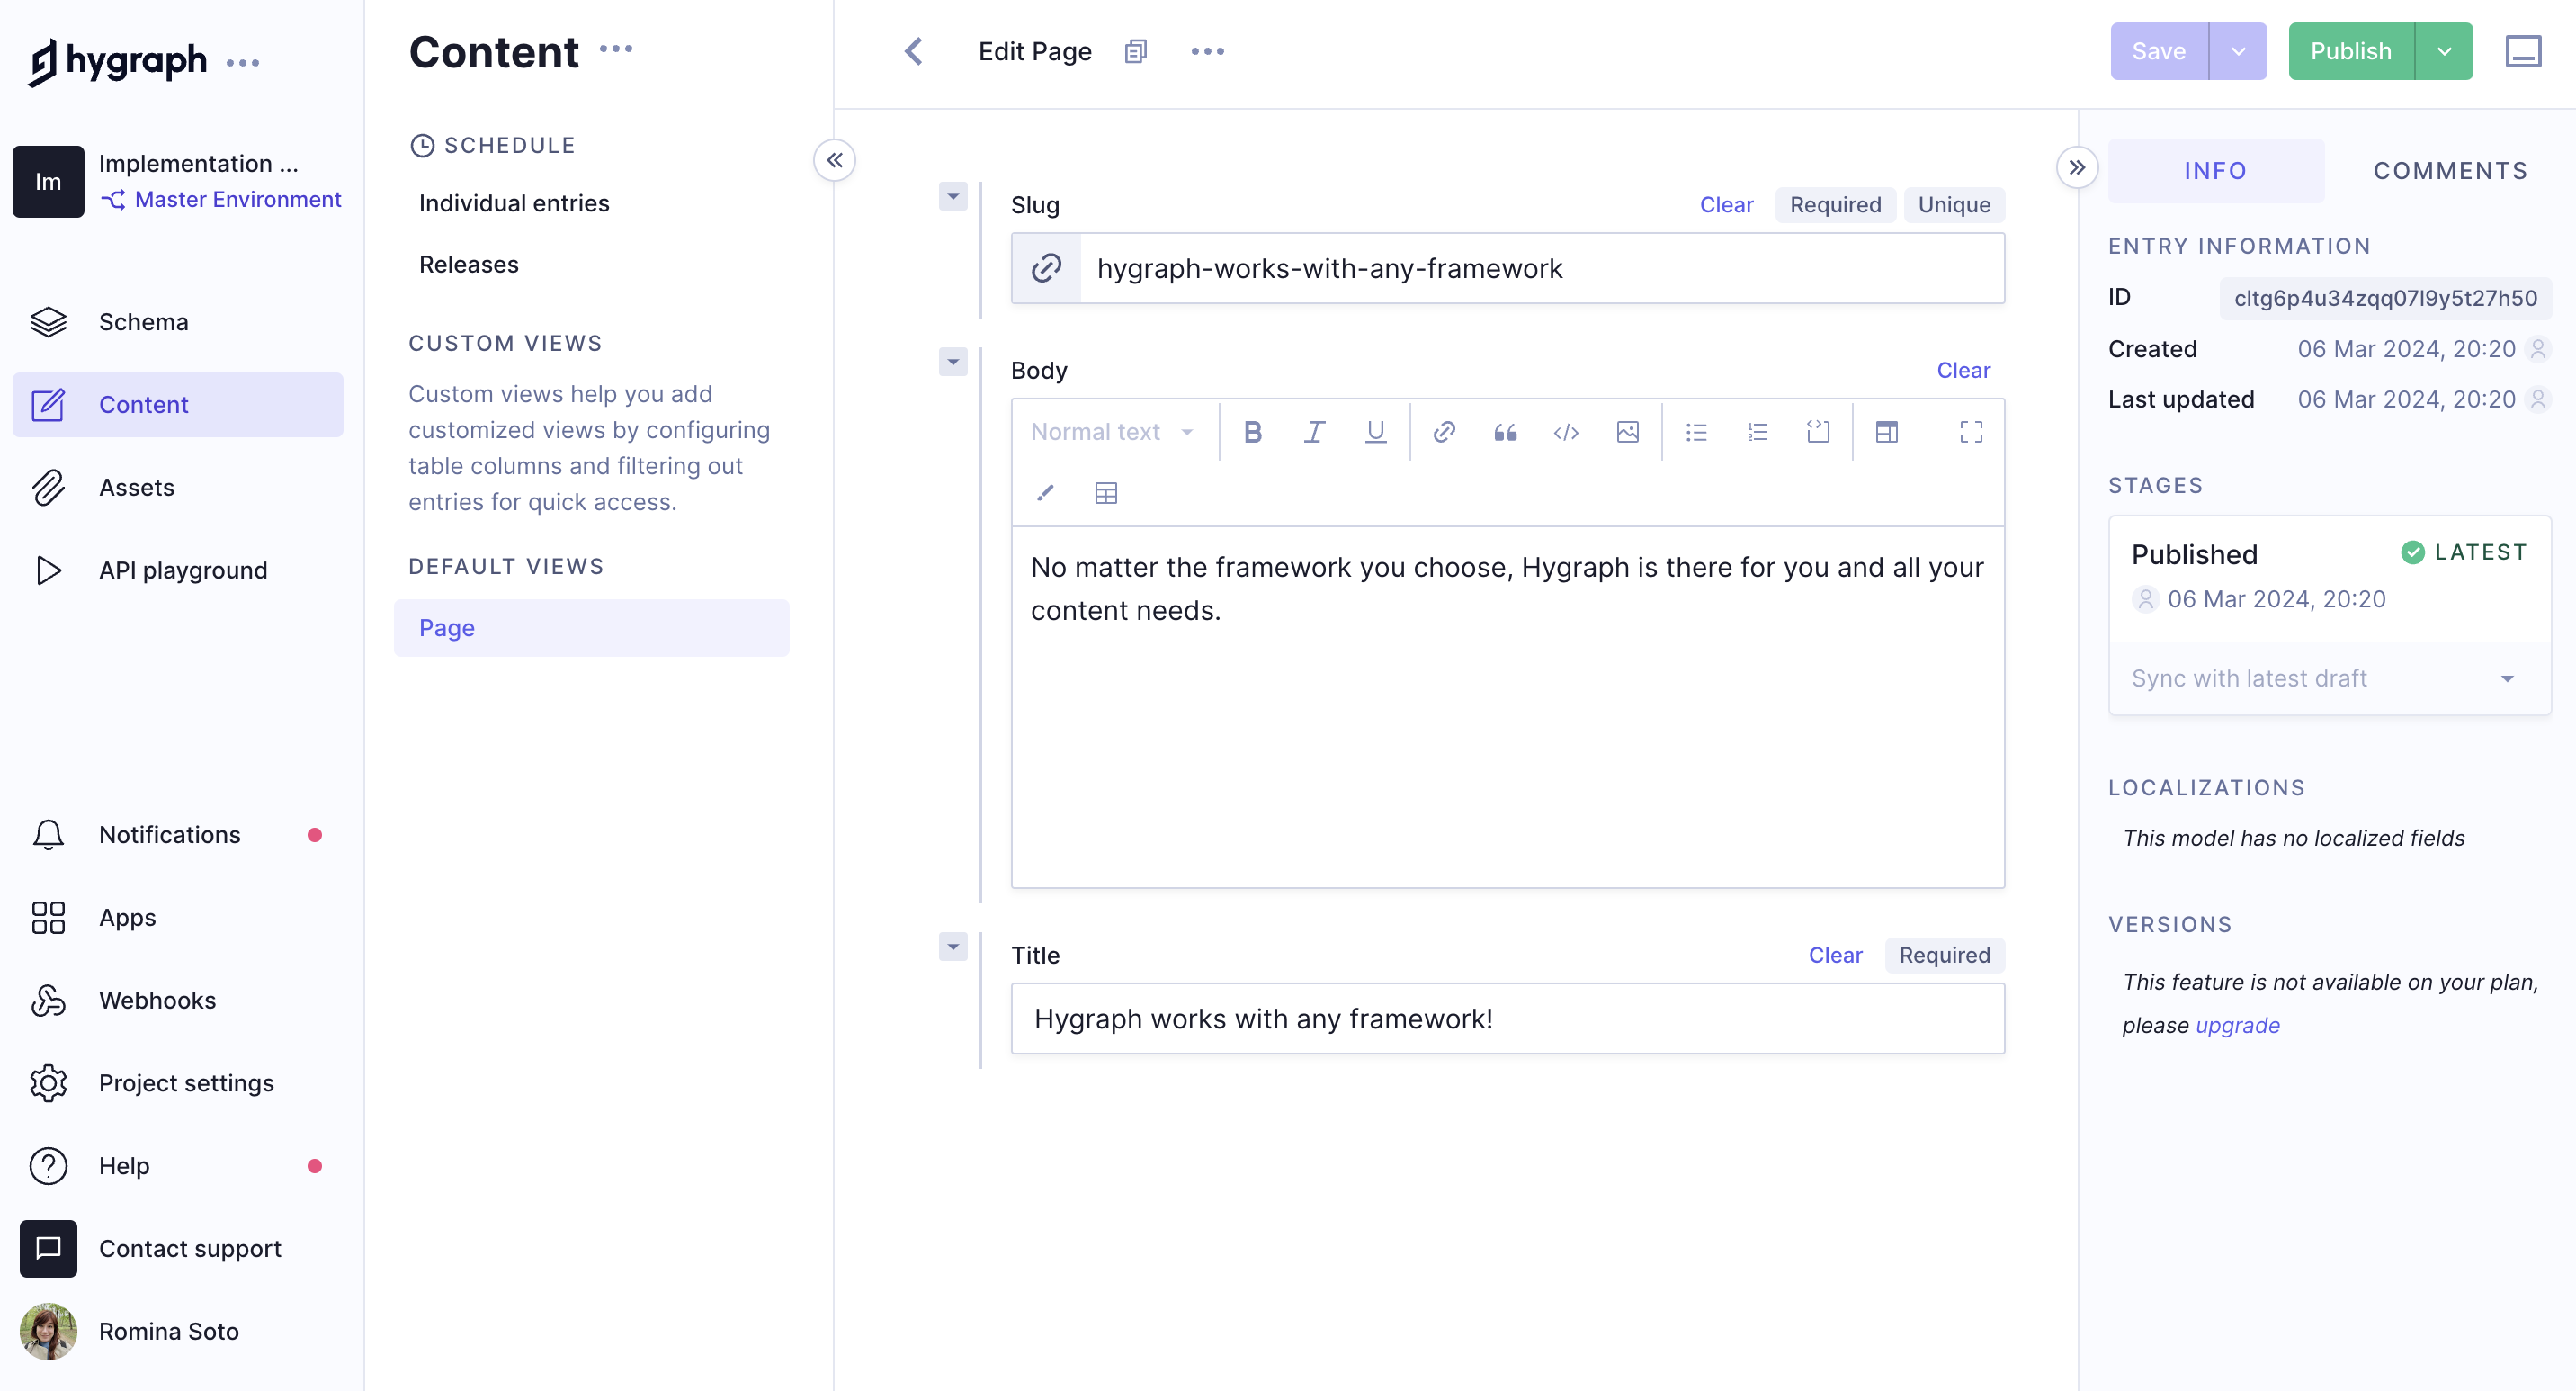 Demo project - Sample content entry
#Public content API
Before you can connect Next to Hygraph, you will need to configure Public Content API access permissions for unauthenticated requests.
To do this, go Project settings > Access > API Access > Public content API in your Hygraph project, scroll to find the Content Permissions box that reads Would you like us to initialize some defaults?, and click Yes, initialize defaults:
 Public Content API permissions
Finally, copy the High Performance Content API endpoint from Project settings > Access > API Access > Endpoints. You use it to connect Next to Hygraph later on.
#Testing a query in the API playground
Next, you should test if you can fetch the information in the sample content entry that we showed you earlier. To do this, navigate to the API Playground in your project and use the following query:
If you execute the query, the response should fetch the sample query in the demo project you cloned.
Want to see Next and Hygraph in action? Watch a quick video on how to connect Next and Hygraph:
#Generating Hygraph content with Next
After enabling API access, you can start using the Pages query with your Next app to render content.
Create an .env file in the root of your Next project. Add the endpoint URL you copied from Hygraph inside the .env file, like this:
NEXT_HYGRAPH_ENDPOINT=https://<HYGRAPH_CDN_LOCATION>.cdn.hygraph.com/content/<ID>/master
#Getting a list of pages for the homepage
After adding your .env file, go to your page.js file in the app directory and replace its contents with the following code:
Code overview
In the above code, we have created the function getPages() that queries and fetches all pages from Hygraph. The Home function calls the getPages function and waits for the query to return with our content from Hygraph. Then, we use our content to render a list of links to other pages and added a button that will bring you back to this guide.
 Homepage
#Creating dynamic page routes with Next
Now, that we have a list of pages in our homepage, we need to create a dynamic route for each page. To do this, create a new directory in the app directory called pages/[slug] and a file called page.js inside the new directory. Once created add following code:
Code overview
In the above code, we are taking advantage of the dynamic routing capabilities of the Next app router to create a page route,http://localhost:3000/page/{page.slug}, that makes new page for every slug. The Page() function calls the getPage function and waits for the query to return with our content from Hygraph. Then, we use our content to render the page title and body text, and added a button that will bring you back to the homepage.
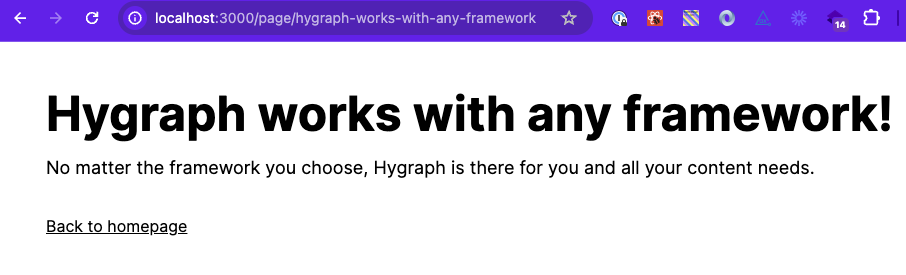 Dynamic page
Congratulations! You have a homepage and a dynamic page route to render all pages and their content.
This was a simple and quick example of how to fetch and render content from Hygraph using Next.
For more complete implementation examples, clone a starter.